6 articles · 3 min read
Create an assistant
Walk through the four-step creation wizard and understand what each setting does.
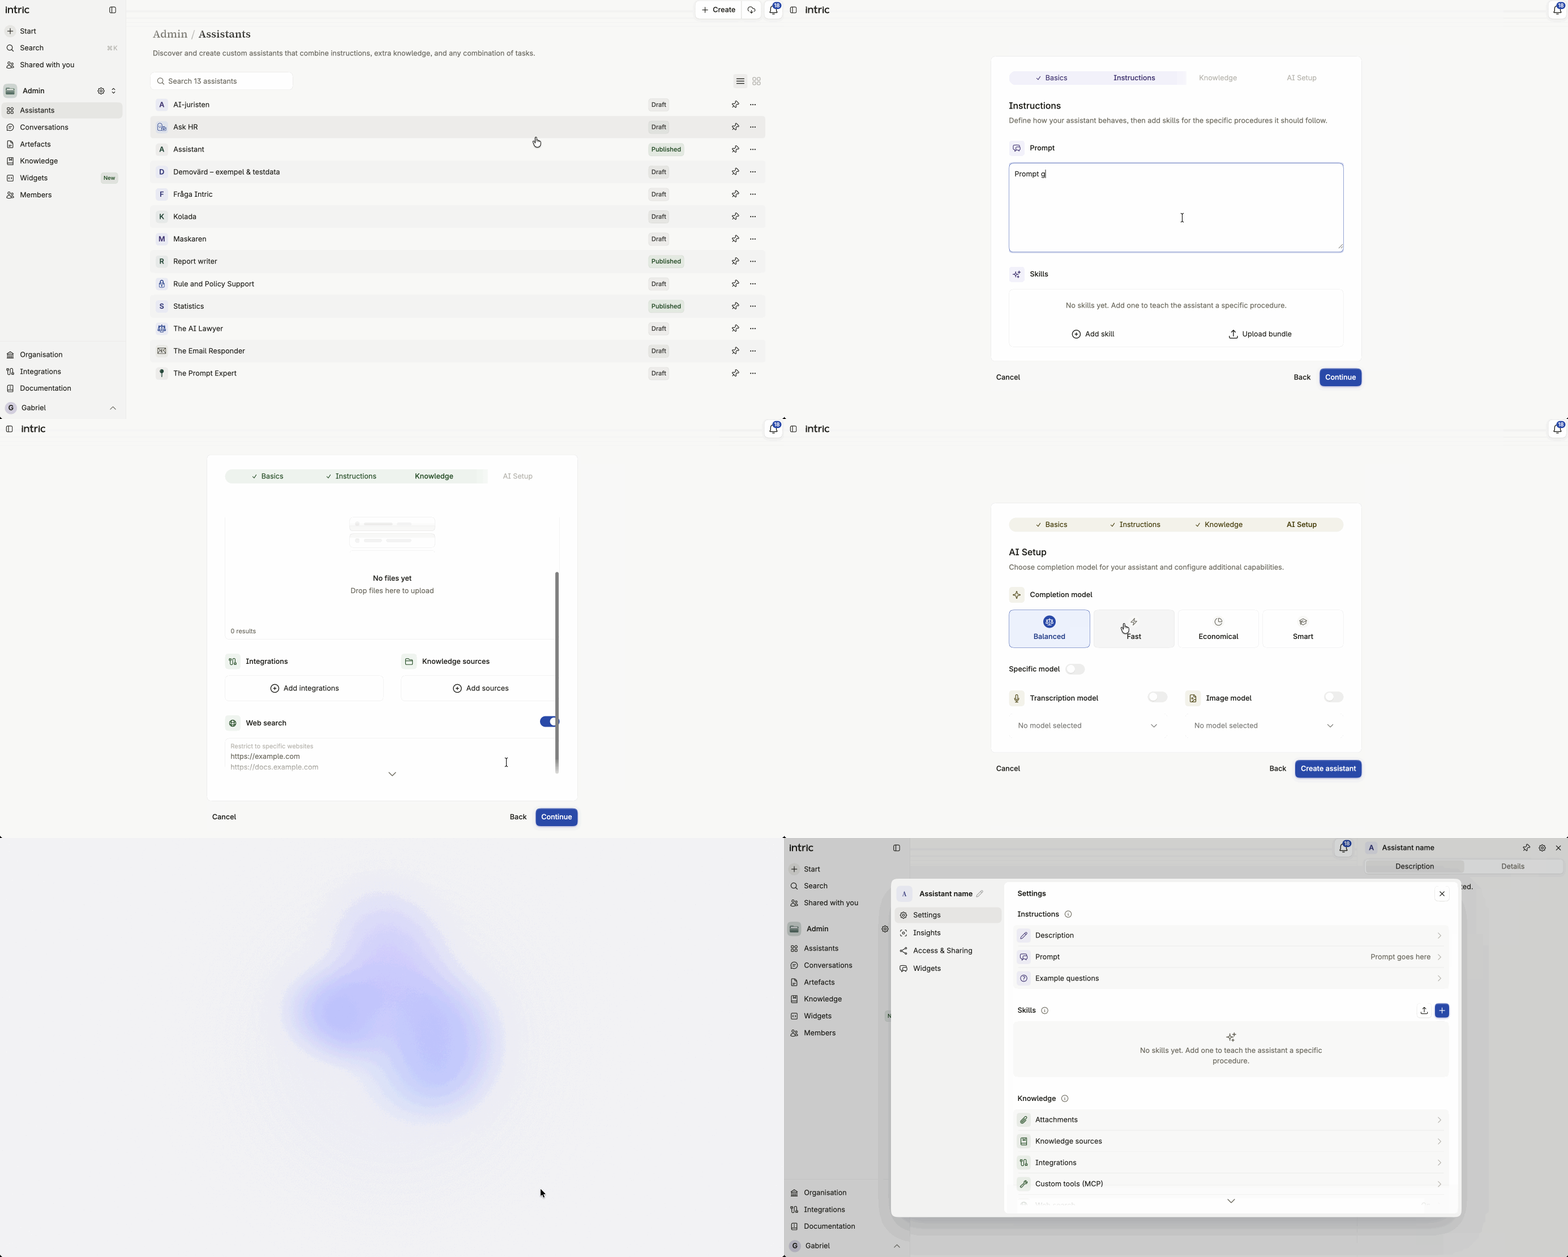
Creating an assistant takes a four-step wizard: Basics, Instructions, Knowledge, and AI Setup. The only field the wizard requires is a name, so you can have a working assistant in seconds and refine it afterward.
Before you start
Section titled “Before you start”Open AssistantsCreate from within the Space where you want the assistant to live. The assistant inherits that Space’s security classification automatically, which decides which models and tools you’ll be able to select later in the wizard.
Step 1 — Basics
Section titled “Step 1 — Basics”- Name — required. The only thing you need to create the assistant.
- Description — optional. What people see in place of the assistant’s default description before they start a conversation.
- Example questions — optional. Conversation starters shown to users as clickable suggestions, up to ten.
Step 2 — Instructions
Section titled “Step 2 — Instructions”- Instructions — the baseline: how the assistant behaves, acts, and stays grounded. Keep this general, and use Skills for anything more specific. This field was called Prompt until recently. See Instructions.
- Skills — add one directly in the wizard, either by writing it from scratch (a title, a description of when to use it, and instructions) or by uploading a skill bundle. See Skills.
Step 3 — Knowledge
Section titled “Step 3 — Knowledge”- Attachments — upload files the assistant will always have loaded.
- Knowledge sources — attach existing knowledge sources the assistant can search on demand.
- Integrations and custom tools — connect knowledge from services your organization has enabled, and any custom (MCP) tools available to the Space.
- Web search — toggle it on, optionally restricted to specific URLs instead of the whole web.
See Knowledge for the full detail on this step.
Step 4 — AI Setup
Section titled “Step 4 — AI Setup”- Completion model — choose from four curated picks: Balanced, Fast, Economical, and Smartest, each weighing quality, speed, and cost differently. Balanced is selected by default. An assistant on a pick follows that pick as Intric’s catalogue moves; switch to a specific model to pin an exact model instead.
- Transcription and image models — shown only if your organization has transcription or image models configured.
See AI setup for more on choosing between them.
Finishing the wizard
Section titled “Finishing the wizard”Create the assistant
- Complete Step 4 and click Create assistant.
- A short animation plays while Intric sets everything up.
- You land on the new assistant’s page, already configured and ready to use.
Changing an assistant after you create it
Section titled “Changing an assistant after you create it”Open the assistant and click Edit at any time to change any setting from the wizard, or add ones you skipped — including Skills.
Duplicating an assistant
Section titled “Duplicating an assistant”To try a change without disturbing the people already using an assistant, duplicate it and work on the copy instead. Duplicate from the assistant’s own settings, from the assistants list, or from the command palette.
The copy starts as an unpublished draft, so it stays visible only to people with editing access until you publish it. See Publishing and approval.